Create a Gauge in SvelteJS Using FusionCharts
FusionCharts is a JavaScript charting library that lets you create interactive charts, gauges, maps, and dashboards using JavaScript. We have built a simple and lightweight SvelteJS directive, which provides bindings for FusionCharts.svelte-fusioncharts lets you add JavaScript charts in your Svelte application or project without any hassle.
In this page, you will see how to install FusionCharts and render a gauge using the svelte-fusioncharts directive.
Prerequisite
Before you begin, make sure your development environment includes Node.js and an npm package manager. SvelteJS requires Node.js version 10.9.0 or later. To download and install Node.js, please visit nodejs.org.
You need to have a Svelte project setup before proceeding any further. If not, you can follow the below steps to initiate the project.
Open a new terminal and execute the following command:
npx degit sveltejs/template my-first-svelte-projectThis command creates a new project folder named my-first-svelte-project and downloads the svelte default project template into that folder. Before running the project we need to make sure that all needed development dependencies are being installed.
cd my-first-svelte-project
npm installOpen the terminal and enter npm run dev to serve your app on localhost:5000.
Installation and Including Dependencies
To install fusioncharts and the svelte-fusioncharts directive via npm follow the steps below.
Install svelte-fusioncharts and fusioncharts libraries with the following command:
npm install svelte-fusioncharts fusioncharts --saveAfter installing the FusionCharts components, you can replace the code in App.svelte file with the code shown in the steps below to create your first gauge. Import all the required dependencies to get started.
<script>
//Import the Fusioncharts library
import FusionCharts from "fusioncharts";
//Import the Widgets
import Widgets from "fusioncharts/fusioncharts.widgets";
//Import the theme as fusion
import FusionTheme from "fusioncharts/themes/fusioncharts.theme.fusion";
//Import the Svelte component
import SvelteFC, { fcRoot } from "svelte-fusioncharts";
// Always set FusionCharts as the first parameter
fcRoot(FusionCharts, Widgets, FusionTheme);
</script>That completes the installation of FusionCharts and the svelte-fusioncharts directive.
Preparing the Data
Gauges are powerful tools that can showcase information using a radial scale to display data.
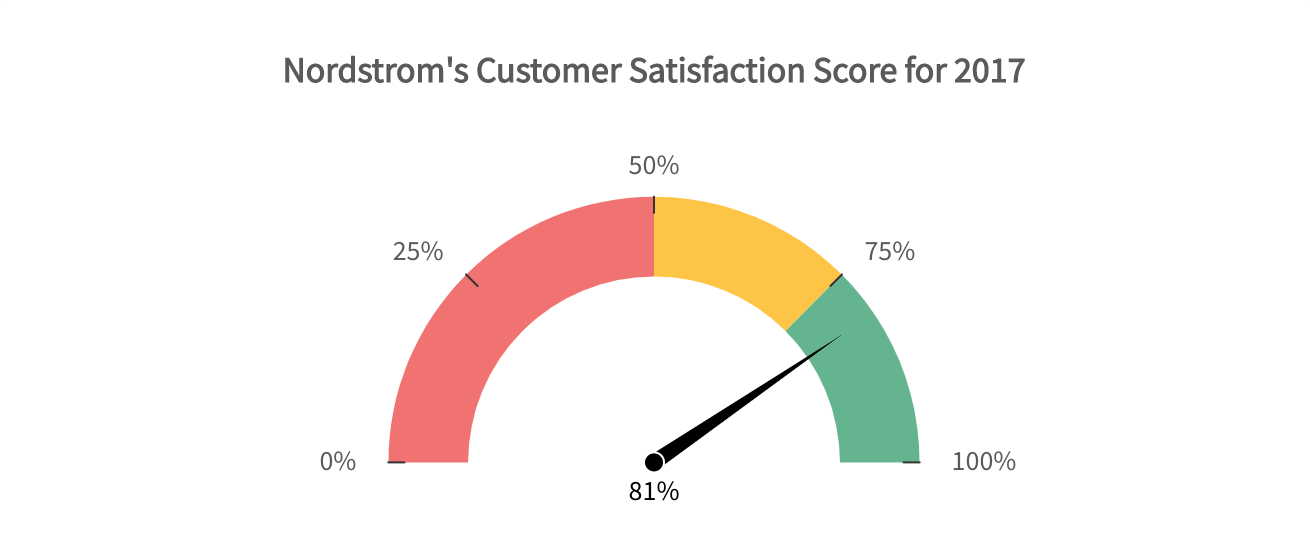
To start with, we'll build a simple angular gauge showcasing Nordstrom's Customer Satisfaction Score as shown below.

The thresholds for the above sample is shown in the table below:
| Range | Color | Hex Code |
|---|---|---|
| 0-50 | Red | #F2726F |
| 50-75 | Yellow | #FFC533 |
| 75-100 | Green | #62B58F |
So, any score less than 50 is bad and is red. Any score between 50 and 75 is average and is yellow. Any score above 75 means good and is green.
FusionCharts accepts the data in JSON format. Prepare the above data in the following way
Create the colorRange object to set the color associated with the specific range of values.
Specify minValue and maxValue within the color array under the colorRange object.
Set the code attribute to specify the hex color of respective ranges.
Create the dials object to represent the customer satisfaction score.
Create the dial object under dials object to set the value of customer satisfaction score.
Include the json objects inside the <script> tag of the
App.sveltefile.
So the data in the tabular form will look as follows:
//STEP 2 : preparing the chart Data
const colorRange = {
color: [
{
minValue: "0", maxValue: "50", code: "#F2726F"
}, {
minValue: "50, maxValue: "75", code: "#FFC533"
}
minValue: "75", maxValue: "100",
code: "#62B58F" }
]
};
const dials = {
dial: [
{
value: "81"
javascript ]
};Configure Your Chart
ow that the data is ready, let's work on the styling, positioning and giving your gauge a context. Store the gauge configurations in a JSON object.
//STEP 3: Create your configuration object
const chartConfigs = {
type: "angulargauge", // The gauge type
width: "450", // Width of the gauge
height: "250", // Height of the gauge
dataFormat: "json", // Data type
renderAt: "chart-container", //Container where the gauge will render
dataSource: {
// Gauge Configuration
chart: {
caption: "Nordstrom's Customer Satisfaction Score for 2017",
lowerLimit: "0",
upperLimit: "100",
showValue: "1",
numberSuffix: "%",
theme: "fusion",
showToolTip: "0"
},
// Chart Data
colorRange: colorRange,
dials: dials
}
};Find the complete list of chart types with their respective alias here.
Render the Chart
Finally, get ready to render your first gauge. Follow the steps mentioned below:
Step 1: In App.svelte include the necessary files and import the fusioncharts dependency.
Store the gauge configurations in a JSON object.
The consolidated code is shown below:
<script>
import FusionCharts from 'fusioncharts';
import Widgets from 'fusioncharts/fusioncharts.widgets';
import FusionTheme from 'fusioncharts/themes/fusioncharts.theme.fusion';
import SvelteFC, { fcRoot } from 'svelte-fusioncharts';
// Always set FusionCharts as the first parameter
fcRoot(FusionCharts, Widgets, FusionTheme);
//STEP 2 : preparing the chart Data
const colorRange = {
"color": [{
"minValue": "0",
"maxValue": "50",
"code": "#F2726F"
}, {
"minValue": "50",
"maxValue": "75",
"code": "#FFC533"
}, {
"minValue": "75",
"maxValue": "100",
"code": "#62B58F"
}]
};
const dials = {
"dial": [{
"value": "81"
}]
};
//STEP 3: Create your configuration object
const chartConfigs = {
type: 'angulargauge', // The gauge type
width: '450', // Width of the gauge
height: '250', // Height of the gauge
dataFormat: 'json', // Data type
renderAt:'chart-container', //Container where the gauge will render
dataSource: {
// Gauge Configuration
"chart": {
"caption": "Nordstrom's Customer Satisfaction Score for 2017",
"lowerLimit": "0",
"upperLimit": "100",
"showValue": "1",
"numberSuffix": "%",
"theme": "fusion",
"showToolTip": "0"
},
// Chart Data
"colorRange": colorRange,
"dials": dials
}
};
</script>
<SvelteFC {...chartConfigs} />Step 2: Export the app from main.js.
import App from "./App.svelte";
var app = new App({
target: document.body
});
export default app;Step 3: Run npm run dev command in the terminal. Once the build is successful, open the localhost file to see your gauge.
See Your Chart
You should be able to see the gauge as shown below:
If you are getting a JavaScript error on your page, check your browser console for the exact error and fix accordingly. If you're unable to solve it, click here to get in touch with our support team.
That's it! Your first gauge using svelte-fusioncharts is ready.